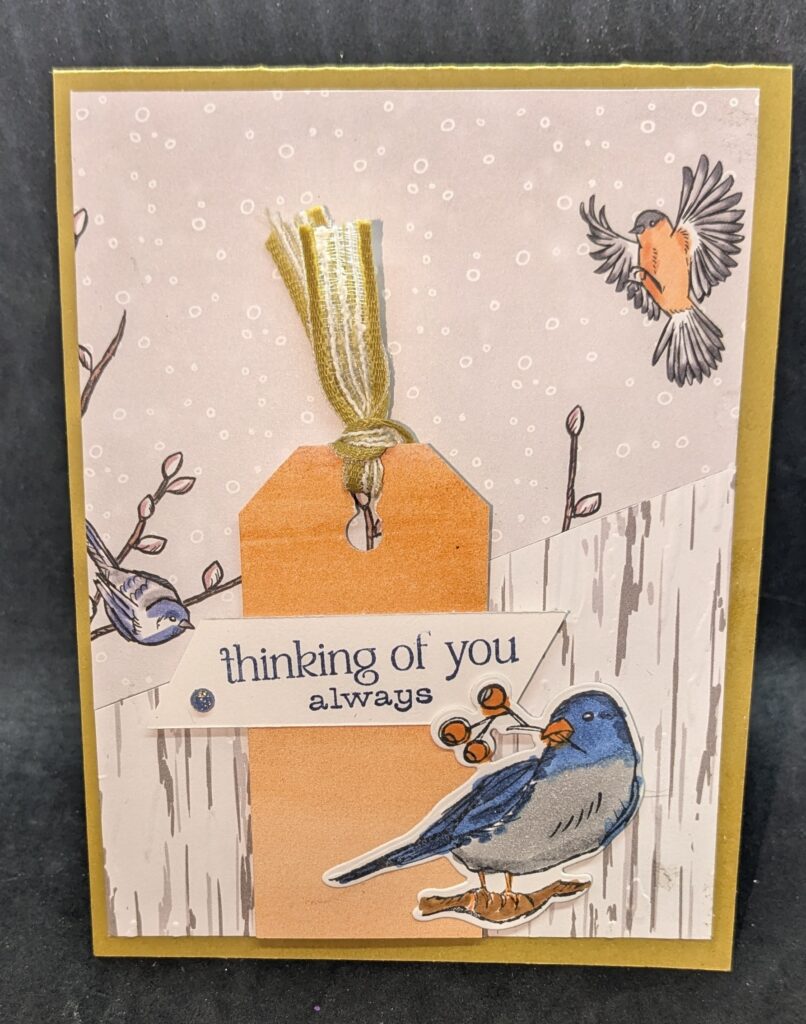
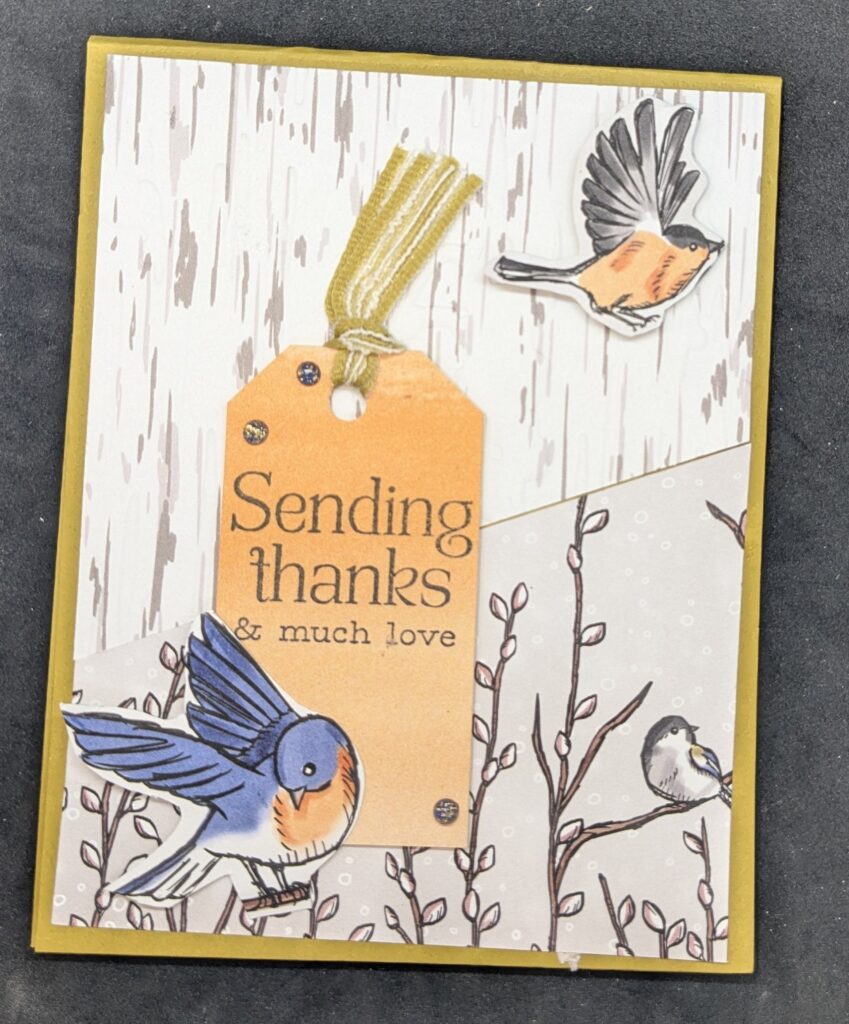
Make Two Cards at Once
Do you find yourself needing more than one card, but you don’t really like to make multiples? This might be the solution for you. You can make two cards at once and yet they look different enough to feel like individual artistic creations and not reproductions.
By cutting the patterned paper you use for the front in half and using two different patterns, you can use the same elements for the cards and by changing which patterned paper is on top, end up with two very different cards. Of course, for even more variety you can make other changes as well:
- Different colored card base
- Tags made from different paper
- Different ribbon and embellishments used
- Different sentiment
Card Details
For this card, I did use different sentiments but they were from the same stamp set. The only other major difference was the position of the different patterned paper.
Both used elements from the Nests of Winter Suite plus the Wild Wheat ribbon and the Regal Foiled Adhesive Backed Dots.
- Emboss the birch wood patterned paper with the Birch Wood Embossing Folder.
- Cut both patterns of paper with 4″ x 5 1/4″ pieces in half diagonally.
- Next, the patterned paper pieces are fit together as card front layers with the patterns in opposite positions on the two cards.
- Make Orange rectangles into tags by snipping the top two corners and punching a hole in the top center.
- Add birds to the cards either by fussy cutting from the Nest of Winter DSP or by stamping, coloring, and cutting out with dies.
- Add the sentiment from the Winterly Treetops stamp set by either stamping directly on the tag or creating a label that is then added to the tag.
The best part about this, there was no waste. One 8 1/2″ x 11″ piece of cardstock cut in half created the two card bases and the two different pieces of patterned paper cut in half make the card fronts for the two cards. 🙂
Click here to see and purchase products used to create this card.
Click here to see and purchase products used to create this card.


Host code for
| April 1-13 is ZKNT7CQZ |


Such a great double take on the sketch! Both are wonderful!